
What is Trezor Wallet? Instructions for installation and use [Step-by-Step Guide]
In this article, I will guide how to install and use Trezor wallet in the most detail possible.
But before I get started, I want to emphasize that this article is for:
- Brothers want to store cryptocurrency for a long time (usually big 1 year).
- You must have a basic knowledge of Private Key / Seed Phrase security and be aware of its importance.
- Proficient use of mobile storage wallets such as Coinbase, Binance ...
What is Trezor Wallet?
Trezor is one of the hardware wallet used to store popular electronic coins. The wallet developed by the company SatoshiLabs and released the first product in 2014.
Trezor wallet review (Model T)
SatoshiLabs released two Trezor product lines, Trezor One (2014) and Trezor Model T (2018).
So, I will show you the latest product line - Trezor Model T.
Advantages:
- Compact design.
- Supports more than 1000+ cryptocurrencies.
- High security.
- Open Source.
Defect:
- The price is quite high compared to the general premises (165 $).
- The touch screen on the wallet is difficult to operate.
Instructions to install Trezor wallet (Model T)
Test the device before installing
When you buy the Trezor Model T hardware wallet, open up to check if there are all four components:
- 01 Trezor Model T device (with 01 USB cable).
- 01 instruction book.
- 02 "Recovery Phrase Cards" paper cards Note: If you already have words on it, please notify the support team immediately for support.
- Some other accessories such as: Magnetic Dock, Sticker, Lanyard….


After that, you carefully check the anti-counterfeiting stamp on the Trezor Model T.
If you do not have any problems, you can proceed with the installation of Trezor wallet with the instructions below.
Install Trezor Model T wallet
The installation process for Trezor Model T wallet is quite simple and only takes about 15 minutes for you. Includes the following steps:
Step 1: Activate the device
To begin the installation process, you need to connect the Trezor Model T device to the computer using the supplied USB cable.
Then, you visit the website trezor.io/start and select "Trezor Model T"> "Continue to Wallet".

Step 2: Update the Firmware
After being directed to Wallet.Trezor.io, you wait for Trezor Wallet to recognize the device.
Once the identification has been confirmed, Trezor Wallet will ask you to update the device's Firmware.
Just click on "Install Firmware" and wait for the installation to finish.

Step 3: Create a Trezor wallet
After updating the Firmware successfully, you need to create a Trezor wallet by clicking on: Create New> Continue to the Wallet.

Step 4: Save 12 recovery words
This step is extremely IMPORTANT , related to the assets of the brothers should monitor closely.
Note: Trezor Model T only has 12 recovery words, not 24 words as before.
To start storing the 12 recovery words, click the button “Create a backup in 3 minutes” as shown below.

Then, you check on your device Trezor will display a message as shown below and press "I UnderStand".

Immediately, Trezor will appear the first 4 recovery words for you to write down (remember to memorize each letter and the order of each word).
After completing the first 4 words, you press on the word Swipe on the device to continue to the next 4 words.
Repeat coming from the 12th is recorded.
Important: these 12 words, you are ABSOLUTELY not losing or letting others know.

After that, you just need to press and hold for a while on the word “Hold to Confirm” to confirm the completion of saving 12 words.

After performing a 12-word backup, Trezor wallet asks you to set a name for the device.
You name the device on the computer screen and click "Confirm to Continue" is finished.
Step 6: Set up a PIN
This is an important step, the brothers noticed DO NOT FORGOT PIN device.
After naming, you look at the Trezor device. At this point, there will be a notification you need to set up a new PIN for the device.
Check the GREEN box to set up a new PIN.

Then, you set up a PIN for the device by yourself (the minimum PIN is 4 to 9 digits) and press the GREEN button.

After the setup is complete, the device needs you to confirm the newly created PIN again.

Thus, you have completed the installation for your Trezor Model T wallet device.
Trezor wallet manual (Model T)
Get familiar with the Trezor wallet interface
After the device is installed, you can use the Trezor wallet to receive and send money.
Below is the interface of Trezor wallet:
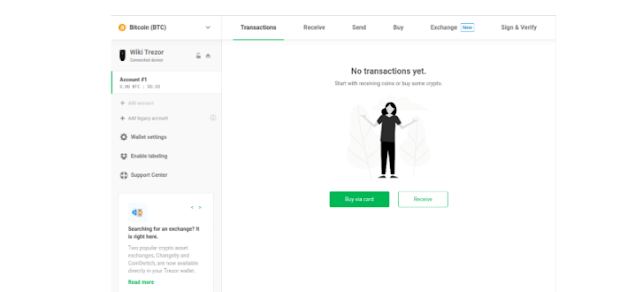
Cryptocurrencies: This is the menu for you to choose from different cryptocurrencies.

Device selection: This is the device selection area to use in case you use multiple Trezor devices at the same time.

Select Account: This is where you handle account-related issues such as creating, deleting, and selecting the account you are using.


Settings area: This is the setting up area for wallet related issues such as changing PIN code, labeling, usage tips and support center.

Instructions to receive & transfer Bitcoin from Trezor wallet
Receiving and transferring the coins is quite similar, so I will use Bitcoin as a sample. Other coins brothers do the same.
Receive Bitcoin:
Right at the interface of Trezor wallet, you only choose the electronic currency as Bitcoin.
Then, select your account in the left-hand corner of the screen and tap the “Receive” tab at the top.

Bitcoin wallet address will be displayed, you click on "Show full address" to see all characters of the wallet address.

Then, you need to double-check that the wallet address is EXACTLY with the Bitcoin wallet address on your Trezor device?
If that's correct, you can use that wallet address to receive Bitcoin.
Transfer Bitcoin from Trezor wallet:
Right interface Trezor wallet, choose Bitcoin and choose the account to use on the left.
Then, select the "Send" tab at the top.

At this point, an interface will appear:
- Address: Enter the Bitcoin address of the recipient.
- Amount: Enter the amount of BTC you want to transfer.
- Fee: Transaction fee to default or customize brother custom.

After completing, you press "SEND".
At that point, your Trezor device will display a message that needs to confirm a Bitcoin transfer.
Your job is to double-check that the Bitcoin wallet address on the device and the recipient's Bitcoin wallet address are correct or not?
If so, press the green button.

Then, the Trezor device will clearly display the details of the transaction including the number and transaction fee.
You only need to hold for a while on the box "Hold to confirm" that your Bitcoin transfer will be done successfully.

Conclusion:
At the end of this article, hopefully new entrants in the crypto market can easily install and use the Trezor Model T storage device.
If you have questions during the installation, please leave a comment below so that the our team can assist you as soon as possible.
Dear brothers and sisters, see you in the next posts.


Post a Comment